
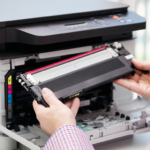
Test page printing represents a diagnostic cornerstone within modern printing workflows. Whether you’re commissioning a brand-new Canon image RUNNER or troubleshooting colour discrepancies on an ageing Xerox workhorse, executing a proper test print delivers quantifiable insight into your device’s operational status. This procedural step validates component functionality, reveals calibration drift, and exposes maintenance requirements before they escalate into costly malfunctions.
Professional printers recognise test pages as preventative medicine. A single diagnostic sheet can forestall hundreds of pounds in wasted substrate, aborted print runs, and emergency technician callouts. The test page methodology extends beyond simple mechanical verification—it encompasses colour accuracy assessment, resolution validation, and alignment confirmation across multiple print technologies.
Why Test Pages Matter in Commercial Environments
Within high-volume printing operations, quality assurance protocols demand rigorous verification before production commencement. A test page serves multiple critical functions:
- Calibration verification: Ensures colour profiles match specified standards
- Mechanical diagnostics: Identifies roller misalignment, drum degradation, or toner distribution anomalies
- Substrate compatibility: Confirms proper paper handling across various weights and finishes
- Driver configuration validation: Verifies software settings translate accurately to physical output
Manufacturing environments processing bespoke packaging materials—corrugated boxes, flexible pouches, or rigid containers—cannot afford chromatic drift or registration errors. A systematic test printing regimen intercepts these issues at their nascent stage, maintaining brand colour integrity across production batches.
Method One: Windows Operating System Test Page Procedure
Windows environments offer streamlined access to built-in test page functionality through the Control Panel architecture. This native solution requires no third-party applications and generates a standardised diagnostic pattern.
Step-by-Step Windows Test Print Instructions
Navigate to Devices and Printers
Access the Control Panel through the Start menu search function. Type “Control Panel” and select the corresponding application. Within the Control Panel interface, locate and click “Devices and Printers” or “View devices and printers” depending on your Windows version.
Select Your Target Printer
The Devices and Printers window displays all recognised printing hardware, including network-attached devices and USB-connected peripherals. Right-click the printer requiring diagnostic evaluation. A contextual menu appears offering several management options.
Access Printer Properties
From the contextual menu, select “Printer properties” (distinct from the basic “Properties” option). This launches the comprehensive configuration interface containing driver settings, advanced features, and maintenance tools.
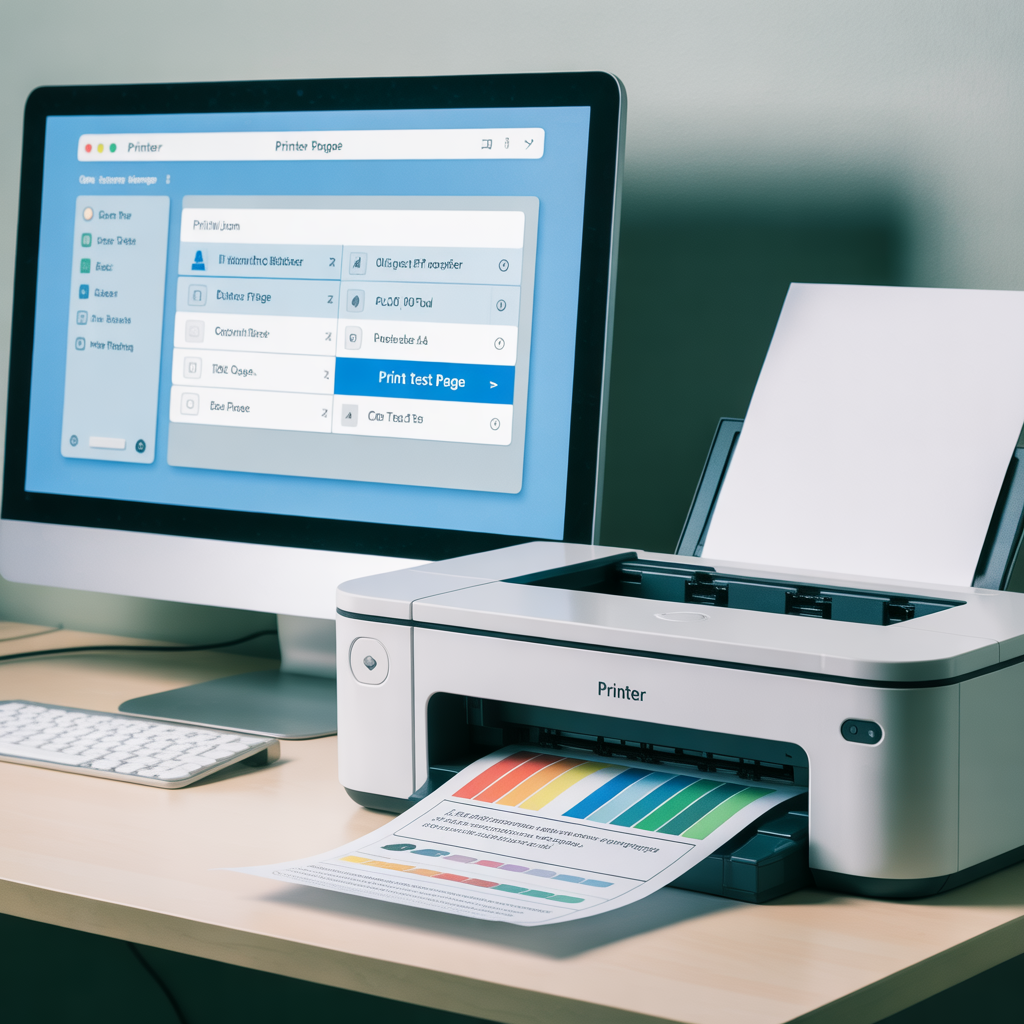
Execute the Test Print
Within the Printer Properties dialogue box, locate the “Print Test Page” button—typically positioned at the bottom right quadrant. Click this button to initiate the diagnostic sequence. The system transmits a predefined pattern containing text elements, geometric shapes, and colour gradients to the selected printer.
Interpreting Windows Test Page Results
The Windows test page architecture incorporates several diagnostic elements:
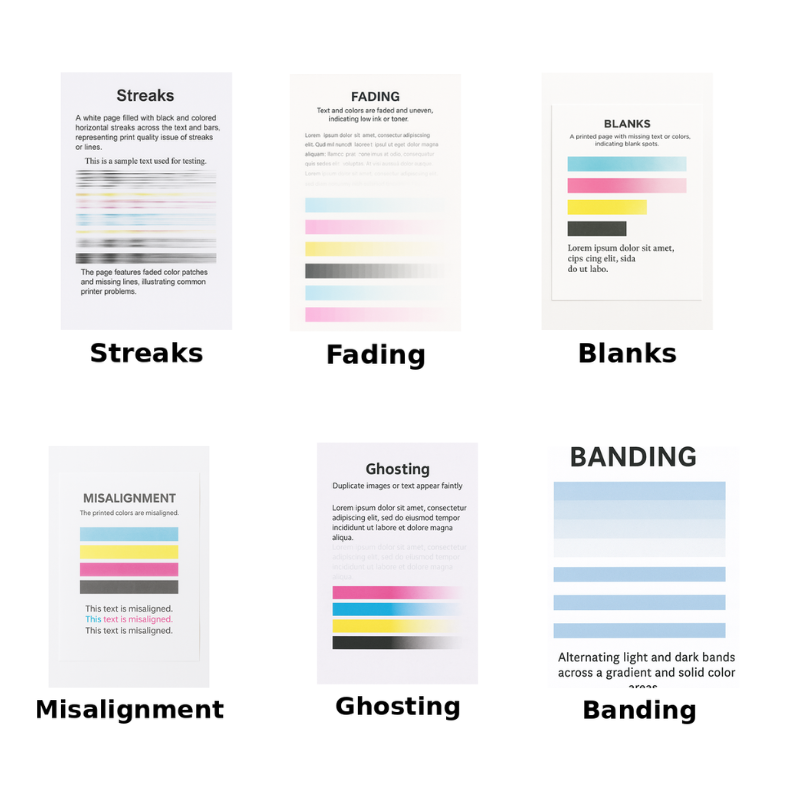
Examine the output meticulously. Streaking suggests drum contamination or worn transfer components. Colour casts indicate profile misconfiguration or aging toner cartridges. Banding patterns reveal roller synchronisation issues requiring immediate attention.
Method Two: macOS Test Page Generation
Apple’s macOS ecosystem structures printer diagnostics differently, integrating test functionality within System Preferences and print queue management tools.
Executing Test Prints on Mac Systems
Open System Preferences
Click the Apple menu icon (top-left screen corner) and select “System Preferences” or “System Settings” on newer macOS versions. Navigate to “Printers & Scanners” to access connected printing devices.
Select and Configure Your Printer
Identify your target printer from the left-side device list. Click the device name to reveal configuration options. Select “Options & Supplies” or “Printer Settings” depending on your macOS iteration.
Locate Utility Functions
Within the printer settings interface, navigate to the “Utility” tab. This section houses manufacturer-specific diagnostic tools including nozzle checks, head alignment routines, and test page generators.
Generate the Diagnostic Print
Click the “Print Test Page” or “Print Utility Page” button. Some printer manufacturers integrate proprietary test patterns—HP offers alignment grids whilst Epson provides nozzle check patterns. These specialised diagnostics offer deeper insight than generic test pages.
Alternative macOS Test Printing Approach
Open any application supporting print functionality—TextEdit, Preview, or Pages work admirably. Create a document containing varied elements: body text, headings, colour blocks, and images. Execute a standard print command (Command+P) to verify end-to-end workflow functionality.
Method Three: Direct Printer Panel Test Printing
Modern enterprise printers incorporate onboard test page functionality accessible via control panel interfaces, bypassing computer dependencies entirely.
Hardware-Initiated Test Page Procedures
Access Printer Control Panel Menu
Approach your printing device and locate the LCD touchscreen or button-based control panel. Navigation conventions vary across manufacturers, but most position menu access prominently.
Navigate Configuration Menus
Look for menu options labelled “Settings,” “Tools,” “Maintenance,” or “Diagnostics.” Within these hierarchies, locate test page or configuration page options. Brother printers typically nest this under “Print Reports,” whilst Kyocera devices place it within “System Menu.”
Select Configuration or Test Page
Choose “Print Configuration Page,” “Print Test Page,” or “Network Configuration Page” depending on your diagnostic requirements. Configuration pages reveal IP addresses, firmware versions, and installed options—invaluable during troubleshooting scenarios.
Manufacturer-Specific Panel Procedures
Different brands implement unique navigation structures:
- HP LaserJet series: Press the Home button, select “Reports,” choose “Configuration/Status Pages”
- Canon imageRUNNER: Touch “Settings/Registration,” navigate to “Output Report,” select “Sample Print”
- Xerox WorkCentre: Press “Machine Status,” select “Tools,” choose “Print Configuration”
- Ricoh/Lanier: Access “User Tools,” select “Print Test Page” under “Output Reports”
Advanced Test Page Applications for Printing Professionals
Experienced print technicians extend test page utility beyond basic functionality verification. These advanced applications demand nuanced interpretation skills developed through sustained industry engagement.
Colour Management Validation
Professional colour workflows require periodic validation against reference standards. Generate test pages containing Pantone swatches, ISO 12647-2 control strips, or custom colour bars. Measure output using spectrophotometers to quantify deviation from target values. This empirical approach identifies calibration drift before customers notice quality degradation.
Substrate Testing Protocols
When introducing new packaging materials—kraft paper, metalized films, textured cardboards—execute comprehensive test printing across multiple settings. Vary print speeds, temperature curves, and colour densities whilst documenting results. This systematic methodology establishes optimal parameters, minimising waste during production runs.
Driver and RIP Configuration Verification
Raster Image Processors (RIPs) and printer drivers incorporate numerous adjustable parameters: colour spaces, halftone algorithms, resolution settings. After configuration changes, mandatory test printing confirms settings propagate correctly. Print identical files before and after modifications, comparing results to isolate configuration impacts.
Preventative Maintenance Scheduling
Establish a test printing calendar aligned with manufacturer maintenance intervals. Monthly diagnostic prints create a documented performance baseline. Progressive degradation becomes immediately apparent when comparing current output against archived samples. This proactive approach prevents catastrophic failures during critical production periods.
Troubleshooting Common Test Page Problems
Even straightforward test printing encounters occasional obstacles. Recognising and resolving these issues swiftly maintains operational continuity.
Test Page Won’t Print
Verify Physical Connections: USB cables deteriorate over time. Network printers require functional Ethernet connections or wireless association. Check cable seating and replace suspect cables.
Confirm Printer Status: Ensure the device displays “Ready” or “Online” status. Paper jams, empty toner cartridges, or open access panels prevent printing. Address error messages before attempting test prints.
Restart Print Spooler Service: Windows print spooler crashes occasionally halt all printing. Open Services (services.msc), locate “Print Spooler,” and restart the service. macOS users should reset the printing system through Printers & Scanners preferences.
Update or Reinstall Drivers: Corrupted driver installations produce unpredictable behaviour. Download current drivers from manufacturer websites—never rely on Windows Update for printing hardware drivers.
Poor Test Page Quality
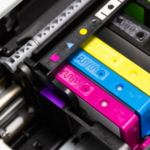
Streaking or Lines: Replace imaging drums or toner cartridges. Clean internal optics using manufacturer-approved procedures. Persistent streaking indicates worn fuser assemblies requiring professional replacement.
Colour Inaccuracy: Recalibrate colour profiles using printer utility software. Replace aging toner cartridges—colour shifts as consumables near depletion. Consider professional colour management consultation for critical applications.
Faint or Light Output: Increase toner density settings through printer properties. Verify cartridges contain adequate toner. Some printers feature “Eco Mode” or “Toner Save” settings reducing output density—disable these features for diagnostic printing.
Smearing or Offset: Reduce print speed to allow adequate drying time. Verify substrate compatibility—coated stocks require specific fuser temperature curves. Clean transfer rollers and intermediate transfer belts per maintenance schedules.
Specialised Test Pages for Specific Requirements
Generic test pages provide baseline diagnostics, but specialised patterns address particular concerns.
Nozzle Check Patterns (Inkjet Technology)
Inkjet printers develop clogged nozzles through extended dormancy or low-quality ink usage. Nozzle check patterns print a grid showing each nozzle’s output. Missing lines indicate blockages requiring head cleaning cycles.
Execute nozzle checks weekly on infrequently-used printers. Run automated cleaning routines when patterns show deficiencies. Persistent clogs necessitate manual cleaning or head replacement.
Registration and Alignment Charts
Multi-pass printing systems—particularly wide-format devices—require precise registration across colour planes. Alignment test patterns feature intersecting lines revealing misregistration. Adjust registration screws per manufacturer specifications until patterns align perfectly.
Halftone and Resolution Test Images
Graphic designers and prepress professionals require resolution validation. Print test images containing fine detail: 1-point rules, small typography, graduated tints. Examine output under magnification to assess dot gain, rosette patterns, and moiré interference.
Creating Custom Test Page Documents
Whilst built-in test pages serve general diagnostics admirably, custom test documents address specific workflow requirements.
Designing Comprehensive Test Layouts
Assemble a multi-page document incorporating:
- Page One: Solid colour blocks (100% C, M, Y, K) revealing density consistency
- Page Two: Graduated tints (0-100% in 10% increments) exposing linearisation accuracy
- Page Three: Fine detail elements (small text, thin rules, intricate graphics) testing resolution limits
- Page Four: Photographic imagery validating colour rendering and tonal reproduction
Save this document as a PDF for consistent reproduction across different applications and operating systems. Store it centrally for team-wide access.
Substrate-Specific Test Files
Package printing applications demand substrate-specific test files. Create documents matching your production specifications: spot colours for flexographic printing, white underbase layers for transparent films, variable data fields for personalised packaging.
Print these customised tests on actual production substrates. Generic office paper behaves differently than 350gsm folding boxboard or 40-micron polypropylene film.
Integrating Test Printing into Quality Management Systems
Professional printing operations embed test printing within formal quality management frameworks—ISO 9001, G7 methodology, or proprietary standards.
Establishing Documentation Protocols
Create a test print log recording:
- Date and time of test execution
- Operator name and shift designation
- Printer identification and configuration details
- Substrate specifications
- Visual quality assessment (pass/fail against defined criteria)
- Measured colour values (Delta E if applicable)
- Required corrective actions
Digital documentation systems streamline this process. Photograph test pages using consistent lighting, storing images alongside metadata for trend analysis.
Setting Acceptable Tolerance Ranges
Define quantifiable acceptance criteria rather than subjective assessments. Examples include:
- Text sharpness: No character edge distortion visible at 2x magnification
- Colour accuracy: Delta E ≤3.0 from reference values
- Registration: Misalignment <0.5mm across all colour planes
- Density consistency: <5% variation across printed area
These objective standards eliminate interpretation ambiguity, enabling junior staff to make confident quality judgements.
Environmental Considerations for Test Printing
Printing environments significantly impact test page results. Atmospheric conditions alter substrate behaviour and toner/ink performance.
Temperature and Humidity Effects
Paper absorbs or releases moisture based on ambient humidity. Dimensional changes affect registration accuracy and feeding reliability. Maintain consistent environmental conditions:
- Temperature: 20-24°C (68-75°F)
- Relative humidity: 45-55%
- Minimal temperature fluctuation: <2°C hourly
Laser printers generate substantial heat. Ensure adequate ventilation preventing thermal buildup that accelerates component aging.
Substrate Acclimatisation
Allow substrates to equilibrate with the printing environment for 24-48 hours before use. Sealed packaging maintains mill conditions potentially differing dramatically from your facility. Unwrap materials in the printing area, allowing moisture content stabilisation.
Conclusion: Elevating Print Quality Through Systematic Testing
Test page printing transcends simple button-pressing—it represents a diagnostic philosophy ensuring consistent, predictable output. By implementing rigorous test protocols, documenting results systematically, and responding promptly to quality deviations, printing operations achieve excellence whilst minimising waste and customer complaints.
Whether you’re producing high-volume transactional documents or bespoke luxury packaging, test pages provide the empirical foundation for quality assurance. Embrace these procedures not as tedious obligations but as professional tools safeguarding your reputation and profitability.
Integrate test printing into daily routines. Train staff thoroughly. Maintain comprehensive documentation. These practices distinguish exceptional printing operations from mediocre competitors, delivering the reliability and consistency UK businesses demand.

Our mission is to help you reduce your printing costs whether through smarter, more efficient printer use, guidance on choosing the right printer, or by providing high-quality, affordable ink and toner alternatives. At Cynopack, we believe everyone deserves access to cost-effective printing supplies. With over 20 years of industry experience, we’ve helped millions of households, schools, organisations, and businesses save on their everyday printing needs.