
The longevity of your Epson printer hinges on two critical factors: proper Epson ink management and consistent maintenance protocols. Whether you’re operating a bustling office environment or managing a home-based enterprise, understanding the nuances of ink replenishment and printer preservation can save you substantial costs whilst ensuring optimal print quality. This comprehensive guide draws upon fifteen years of printing industry expertise to deliver actionable strategies that extend your equipment’s operational lifespan.
Understanding Your Epson Printer’s Ink System
Before delving into replenishment procedures, it’s essential to recognise that Epson manufactures two distinct ink delivery architectures. Each system requires a tailored approach to maintenance and refilling.
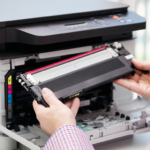
Cartridge-Based Systems
Traditional Epson printers utilise individual ink cartridges—typically four colours (cyan, magenta, yellow, and black) or six colours in photo-centric models. These self-contained units house the ink reservoir, printhead interface, and electronic chip that communicates with the printer’s firmware.
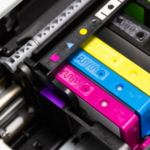
EcoTank and Supertank Systems
Epson’s revolutionary EcoTank range represents a paradigm shift in inkjet technology. These printers feature high-capacity reservoirs that you refill directly from bottles, eliminating the need for frequent cartridge replacements. The initial investment proves economical over time, particularly for high-volume printing operations.
Step-by-Step Guide: Adding Ink to Cartridge-Based Epson Printers
Preliminary Preparations
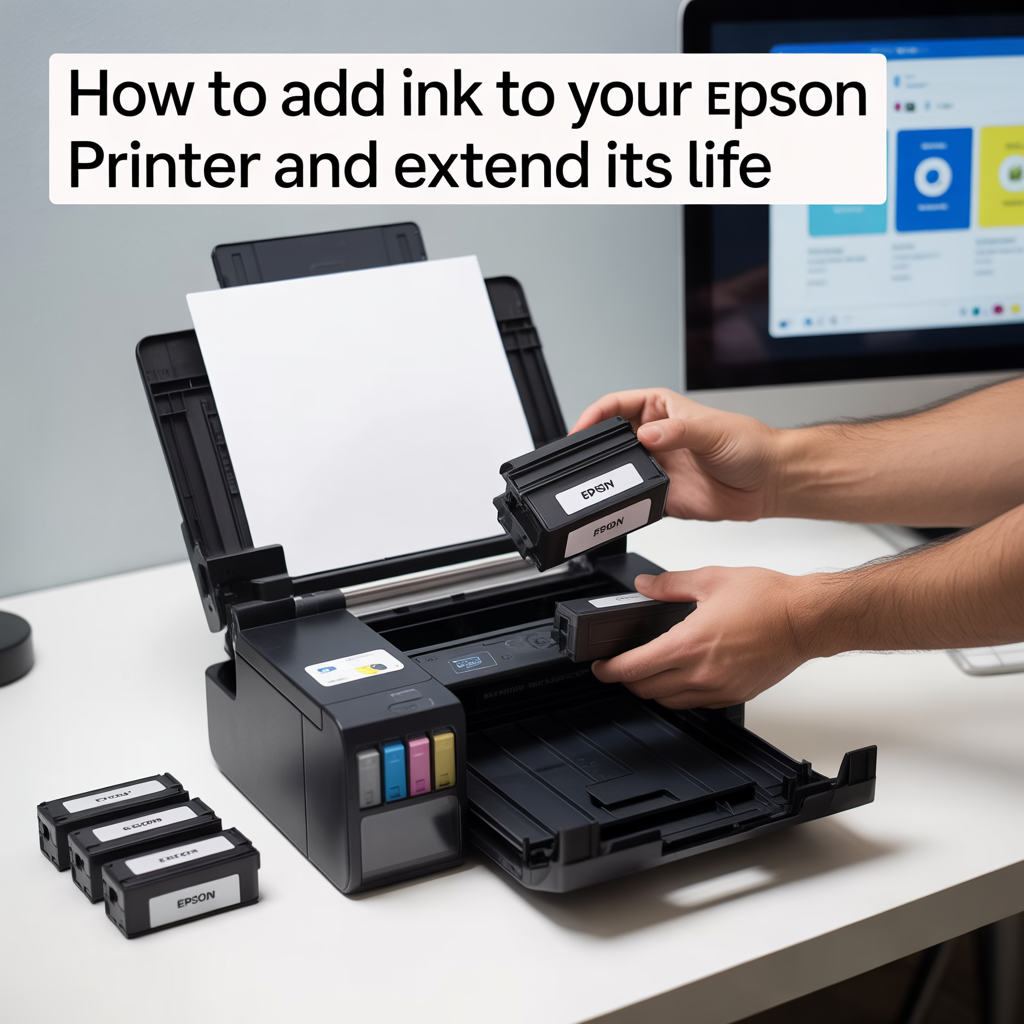
Commence by gathering your materials: replacement cartridges, a clean microfibre cloth, and protective gloves if you’re particularly cautious about ink stains. Ensure you’ve purchased cartridges compatible with your specific model—Epson’s numbering system (e.g., 29XL, 603XL, T0807) varies across product lines.
The Replacement Procedure
Step 1: Power Activation Switch on your printer and allow it to complete its initialisation sequence. Many technicians overlook this step, attempting to manually access the cartridge carriage, which can damage the printhead mechanism.
Step 2: Accessing the Cartridge Bay Lift the scanner unit or open the designated cartridge access door. The print carriage will automatically glide to the replacement position—typically centre-aligned for optimal accessibility. If the carriage doesn’t move, consult your printer’s control panel and select “Replace Ink Cartridges” from the maintenance menu.
Step 3: Cartridge Removal Gently press down on the old cartridge until you hear or feel a click. The cartridge will release from its housing. Extract it carefully, avoiding contact with the copper contacts or ink outlet port. Dispose of depleted cartridges responsibly—many retailers offer recycling programmes that provide modest rebates.
Step 4: Preparing the New Cartridge Remove the replacement cartridge from its sealed packaging. Critically important: do not touch the green circuit board or the printhead nozzle area. These components are extraordinarily sensitive to static discharge and contamination. Remove all protective tapes and seals—orange pull-tabs typically secure the nozzle protective covering.
Step 5: Installation Insert the cartridge at a slight angle, aligning it with the corresponding colour-coded slot. Push firmly until you hear an audible click, indicating proper seating. Incorrect installation prevents electrical contact and triggers error messages.
Step 6: Verification Close the scanner unit or access door. The printer will perform an automatic ink charging cycle, pressurising the system and priming the printhead. This process consumes a small quantity of ink but ensures optimal print quality. Print a nozzle check pattern to verify successful installation.
Comprehensive Guide: Refilling EcoTank Printers
EcoTank systems require a different approach, emphasising careful handling to prevent spillage and cross-contamination.
Bottle Selection and Preparation
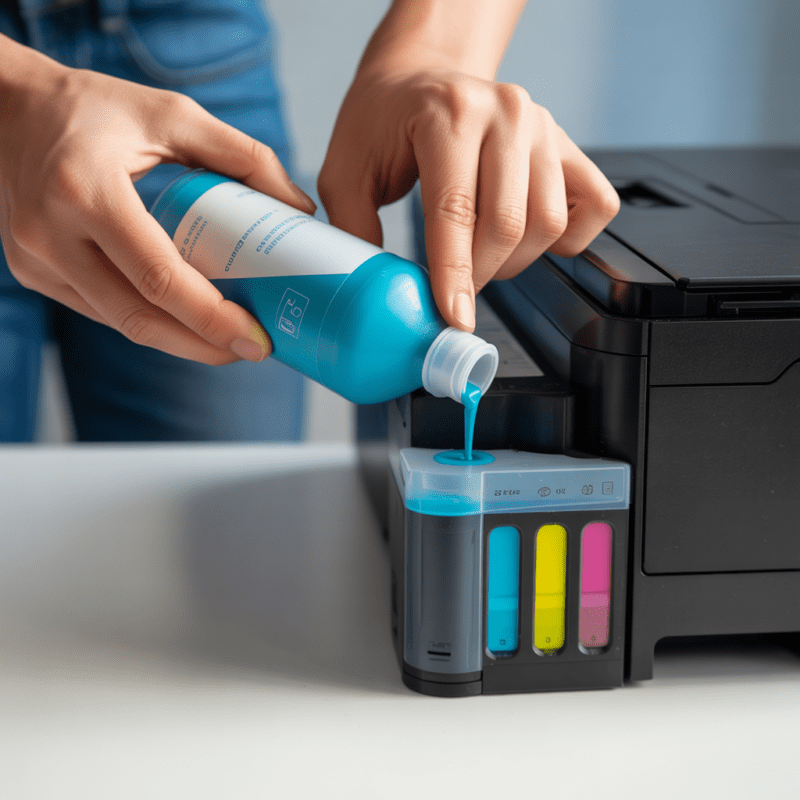
Epson supplies colour-coded bottles corresponding to each ink tank. The bottles feature keyed nozzles that physically prevent inserting the wrong colour into a reservoir—an ingenious fail-safe mechanism. Before opening, shake the bottle gently to ensure pigment homogeneity, particularly with black ink.
The Refilling Process
Accessing the Tanks Locate the ink tank cover—positioning varies by model but typically resides on the printer’s front or right-hand side. Open the cover and identify the tank requiring replenishment. The transparent tanks allow visual confirmation of ink levels.
Removing Tank Caps Unscrew the cap from the designated tank. Place it on a clean surface where it won’t roll away—these small components are remarkably easy to misplace.
Breaking the Bottle Seal Twist off the bottle cap and remove the foil seal. Replace the cap, which contains the dispensing nozzle. Some bottles require you to break a plastic seal on the bottle neck before dispensing.
Controlled Dispensing Invert the bottle and insert the nozzle into the tank opening. The keyed design ensures proper alignment. Gently squeeze the bottle, monitoring the fill level through the tank’s viewing window. Most EcoTank systems incorporate an automatic shut-off mechanism—the bottle stops dispensing when the tank reaches capacity. This prevents overfilling, though maintaining vigilance is advisable.
Securing the System Once filled, remove the bottle and immediately replace the tank cap, tightening it securely to prevent evaporation. Close the tank cover and wipe any residual ink from external surfaces with a damp cloth.
Post-Refill Procedures
After refilling an EcoTank system, the printer typically requires a brief priming cycle. Some models prompt you to press a button to confirm the refill, whilst others detect the level change automatically. Consult your user manual for model-specific instructions.
Advanced Strategies for Extending Printer Longevity
The Critical Importance of Regular Usage
Inkjet technology’s Achilles’ heel manifests as nozzle clogging—a phenomenon where dried ink obstructs the microscopic orifices through which droplets are expelled. To circumvent this issue, implement a weekly printing schedule, even if only producing a test page. This practice keeps ink flowing through the system, preventing pigment crystallisation.
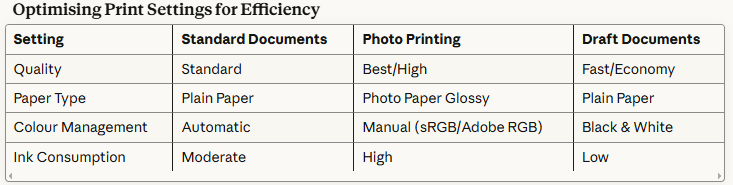
Optimising Print Settings for Efficiency
Adjusting print quality settings dramatically influences ink consumption and printhead wear. Draft mode, whilst producing lower-resolution output, extends cartridge life by up to 40% and reduces mechanical stress on the printhead.
Environmental Considerations
Printer placement significantly impacts operational longevity. Avoid positioning your equipment:
- Adjacent to windows with direct sunlight exposure
- In areas with extreme temperature fluctuations
- Near heat sources such as radiators or heating vents
- In excessively humid or desiccated environments
Optimal operating conditions fall between 15-25°C with relative humidity maintained at 40-60%. These parameters prevent ink viscosity changes and minimise condensation within the printhead assembly.
Maintenance Cycles: When and How to Execute Them
Nozzle Checks Perform weekly nozzle checks to identify developing issues before they necessitate aggressive intervention. Most Epson printers feature this function in their maintenance menu. The resulting pattern should display consistent lines without gaps or streaking.
Head Cleaning Cycles When nozzle checks reveal problems, execute a standard cleaning cycle. This procedure forces ink through the printhead under pressure, dislodging dried pigment. However, exercise restraint—each cleaning cycle consumes approximately 2-3ml of ink from each cartridge. Limit cleaning to once daily, allowing 3-4 hours between attempts for ink to properly saturate the nozzles.
Power Cleaning For stubborn clogs resistant to standard cleaning, Epson printers offer a “power clean” option. This intensive procedure uses substantially more ink—potentially depleting cartridges by 10-15%—but proves effective for severe blockages. Reserve this option for situations where standard cleaning fails after three attempts.
Strategic Ink Management
Avoiding Empty Tank Operation Operating with depleted ink tanks introduces air into the printhead, causing cavitation damage and potentially irreversible nozzle failure. Replace or refill cartridges when levels drop to 20%, rather than waiting for the “empty” warning.
Genuine vs. Compatible Inks Whilst third-party inks offer cost savings, they vary considerably in quality. Premium compatible inks from reputable manufacturers often perform admirably, but bargain-basement alternatives may contain inconsistent pigment concentrations, incorrect viscosity, or contaminants that damage printheads. When using compatibles, research manufacturer reputation and seek products with positive long-term user feedback.
Bulk Ink Storage For EcoTank users maintaining ink bottle inventory, proper storage proves crucial. Store bottles upright in a cool, dark location. Unopened Epson ink maintains stability for approximately two years, whilst opened bottles should be used within six months to prevent pigment settling and bacterial growth.
Troubleshooting Common Ink-Related Issues
Cartridge Recognition Failures
When your printer displays “cartridge not recognised” errors despite correct installation:
- Remove and reinsert the cartridge, ensuring complete seating
- Clean the copper contacts with a lint-free cloth lightly dampened with distilled water
- Verify you haven’t removed the protective tape from the wrong location
- Check for firmware updates that may address compatibility issues
Colour Accuracy Problems
Inconsistent colour reproduction often stems from:
- Clogged nozzles: Execute cleaning cycles and nozzle checks
- Incorrect paper settings: Ensure media type selection matches your substrate
- Expired ink: Old ink experiences pigment separation and colour shift
- Mixed ink brands: Using different manufacturers’ inks in combination creates unpredictable colour interactions
Streaking and Banding
Horizontal lines or gaps in printed output indicate:
- Partially clogged nozzles: Requires cleaning cycles
- Low ink levels: Top up or replace cartridges
- Misaligned printhead: Access the alignment utility in printer settings
- Debris on the printhead: Carefully clean the printhead assembly following manufacturer guidelines
Preventative Maintenance Schedule
Implementing a structured maintenance regimen dramatically extends equipment lifespan. Consider this professional-grade schedule:
Weekly Tasks
- Print at least one page to keep ink flowing
- Perform nozzle check patterns
- Verify ink levels and plan replenishment
Monthly Tasks
- Execute printhead alignment
- Clean printer exterior and paper feed rollers
- Inspect ink tanks or cartridges for leakage
Quarterly Tasks
- Deep clean the printer interior (powered off, using compressed air)
- Update printer firmware
- Assess print quality trends and address emerging issues
Annual Tasks
- Professional servicing for high-volume environments
- Comprehensive printhead assessment
- Replace consumables such as maintenance boxes or waste ink pads
Maximising Return on Investment
Your Epson printer represents a significant capital investment. By implementing the strategies outlined above, you can expect:
- Extended cartridge life: Proper settings and maintenance reduce consumption by 25-40%
- Enhanced print quality: Consistent maintenance prevents degradation
- Reduced downtime: Preventative measures minimise catastrophic failures
- Lower total cost of ownership: Fewer repairs and replacements translate to substantial savings
The printing industry has evolved considerably over the past decade and a half, yet fundamental principles remain constant: regular usage, appropriate materials, and proactive maintenance form the triumvirate of printer longevity. Whether you’re producing client presentations, product labels, or family photographs, these practices ensure your Epson printer delivers reliable performance for years beyond its anticipated lifespan.
By understanding your specific printer model’s requirements and adhering to manufacturer guidelines whilst incorporating these industry-tested strategies, you transform routine maintenance from a reactive chore into a proactive investment in your equipment’s future. The modest time commitment required for proper ink management and maintenance pales in comparison to the expense and inconvenience of premature printer replacement or emergency repairs.
