
Replacing ink cartridges in your Epson printer is a straightforward task — but doing it correctly is key to avoiding printing errors, streaks, or damage to the printhead.
In this guide, we’ll walk you through step-by-step instructions for replacing Epson ink cartridges, with tips to keep your prints sharp and your printer in top condition. We’ll also link to Cynopack’s affordable compatible Epson inks so you can save money without compromising quality.
Maintain clear step-by-step structure for Google snippet targeting.
1. When Should You Replace Your Epson Ink Cartridges?
You should replace your ink cartridges when:
- Your printer displays a “Low Ink” or “Replace Cartridge” message.
- Printouts are faded or missing colours.
- You’ve tried cleaning the printhead but print quality hasn’t improved.
Related Reading: How to Easily Check Ink Levels on Your Epson Printer
2. Choosing the Right Replacement Ink
You have two main choices in the UK market:
- Epson Original (OEM) Ink Cartridges – Reliable but often expensive.
- Compatible Ink Cartridges – Like Cynopack’s Epson Compatible Inks — high-quality alternatives that can save you up to 70% compared to OEM prices.
Tip: Always match the cartridge model number to your printer (e.g., Epson 604XL, 29XL, 33XL) to avoid compatibility issues.
3. Step-by-Step: How to Replace an Epson Ink Cartridge
These steps apply to most Epson Expression, EcoTank (with cartridges), and Workforce models used in UK homes and offices.
Step 1: Turn On Your Printer
- Make sure the printer is powered on before you start.
- If it’s off, turning it on will position the printhead for cartridge replacement.
Step 2: Open the Printer Cover
- Lift the scanner unit or top cover, depending on your model.
- The printhead carriage will move to the replacement position automatically.
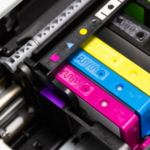
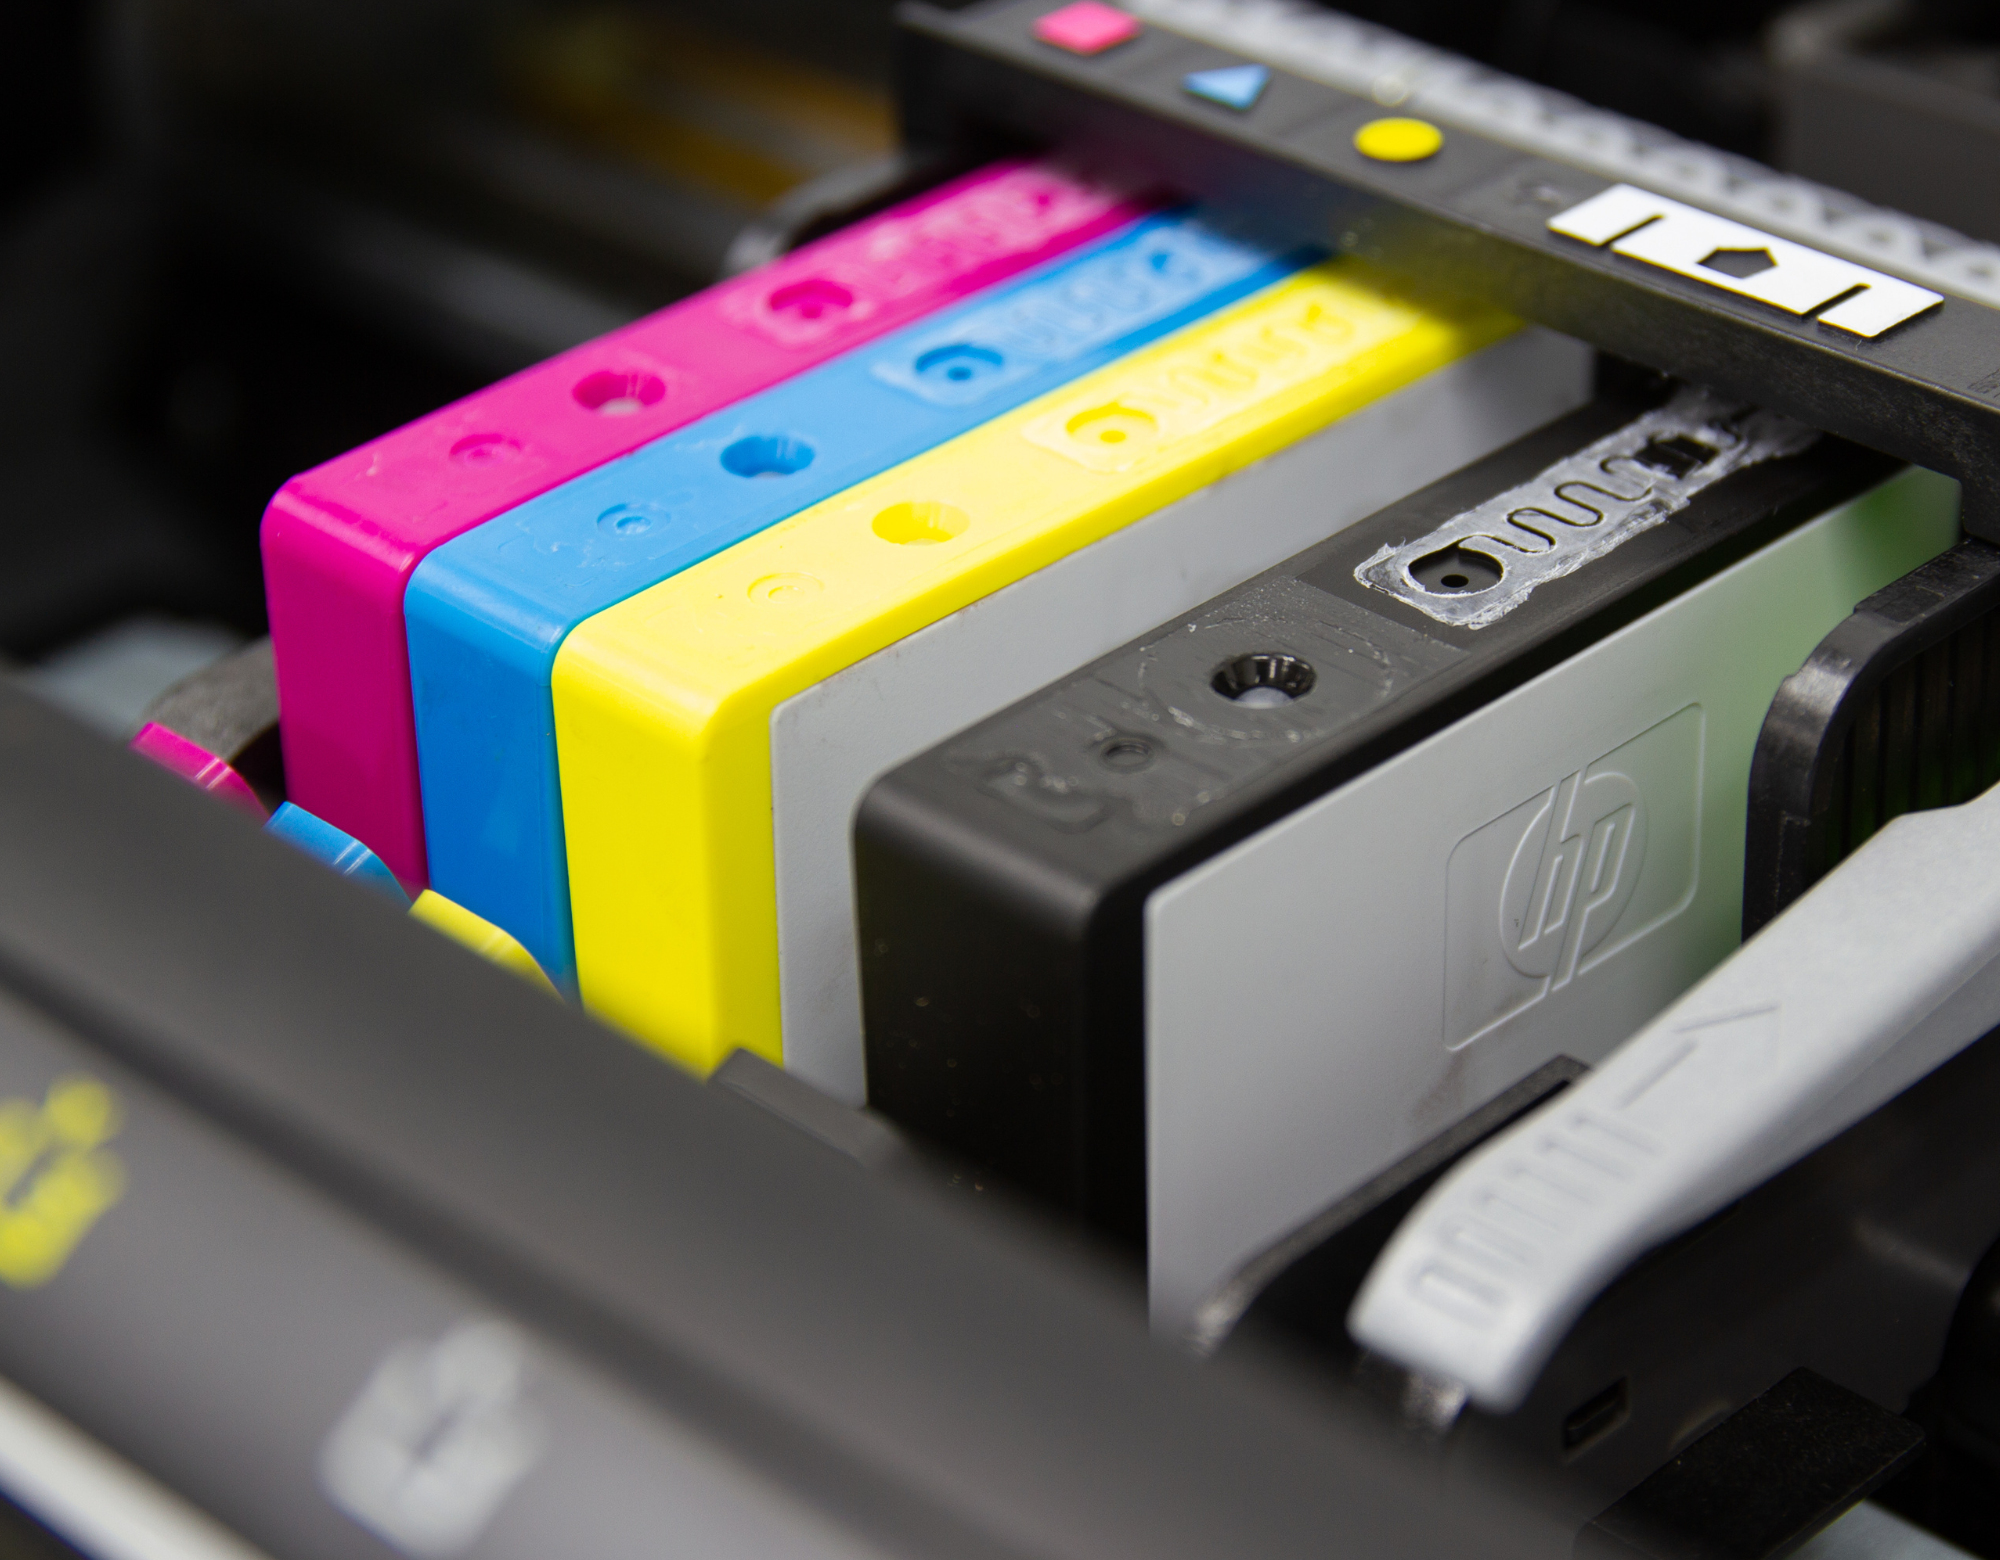
Step 3: Identify the Empty Cartridge
- Your printer’s display screen will show which cartridge is low or empty.
- The empty cartridge will usually be marked on the carriage.
📌 Related Article: How to Save Ink and Print Smarter
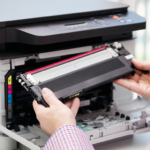
Step 4: Remove the Empty Cartridge
- Press the tab at the back of the cartridge.
- Lift it straight up and out of the carriage.
Tip: Avoid touching the gold chip or ink nozzles — this can damage the cartridge.
Step 5: Prepare the New Cartridge
- Remove it from the packaging.
- Gently remove the yellow or transparent protective tape over the ink port.
Important: Do not remove or damage the small electronic chip — your printer uses it to recognise the cartridge.
Step 6: Install the New Cartridge
- Insert the new cartridge into the slot.
- Press down until it clicks into place.
- Ensure you install it in the correct colour slot.
Step 7: Close the Printer Cover
- Lower the scanner unit or cover back into place.
- The printer will automatically charge the ink system — this may take 1–3 minutes.
Step 8: Print a Test Page
- After replacement, print a test page to ensure all colours are working.
- If lines or gaps appear, run a printhead cleaning cycle.
📌 Related Reading: How to Clean Epson Print Heads for Crisp, Clear Prints
4. Tips to Get the Most from Your Epson Ink Cartridges
- Use compatible high-yield cartridges like Epson 604XL Compatible Ink for more prints per refill.
- Print at least once a week to avoid ink drying in the nozzles.
- Store spare cartridges in a cool, dry place.
5. Troubleshooting: When Your Epson Doesn’t Recognise a New Cartridge
Sometimes after replacing a cartridge, your printer might display an “Ink Cartridge Not Recognised” message.
Quick Fixes:
- Remove and reinsert the cartridge.
- Wipe the gold contact chip gently with a lint-free cloth.
- Turn the printer off and on again.
For more help: Epson Printer Reset – Quick Fixes for Common Issues
6. Eco-Friendly Disposal of Used Cartridges
In the UK, it’s illegal to throw ink cartridges in regular household waste.
- Use Epson’s recycling programme or a local recycling point.
- Many UK charities collect empty cartridges to raise funds.
📌 Read: [Maintaining Your Epson Printer: Ink Cartridge Disposal and Recycling] (future link once article is live)
Frequently Asked Questions (AEO-Optimised)
Q1: Can I replace Epson ink cartridges before they are empty?
Yes — this can prevent printhead drying and is common for users who need guaranteed quality.
Q2: Are compatible Epson cartridges safe to use?
Yes, if you buy from a trusted UK supplier like Cynopack, they work just as well as OEM inks.
Q3: How long do unopened Epson cartridges last?
Typically 18–24 months if stored properly in a cool, dry place.
Q4: Do I need to align my printer after changing ink?
It’s recommended if you notice misaligned text or images.
Q5: What should I do if my new cartridge leaks?
Stop using it immediately and contact your supplier for a replacement.
Conclusion
Replacing ink cartridges in your Epson printer is quick and easy when you follow the correct steps. By choosing high-quality compatible inks from Cynopack, you can cut costs, maintain excellent print quality, and keep your printer running smoothly.
For the best results, always handle cartridges carefully, print regularly, and store spares in optimal conditions.