


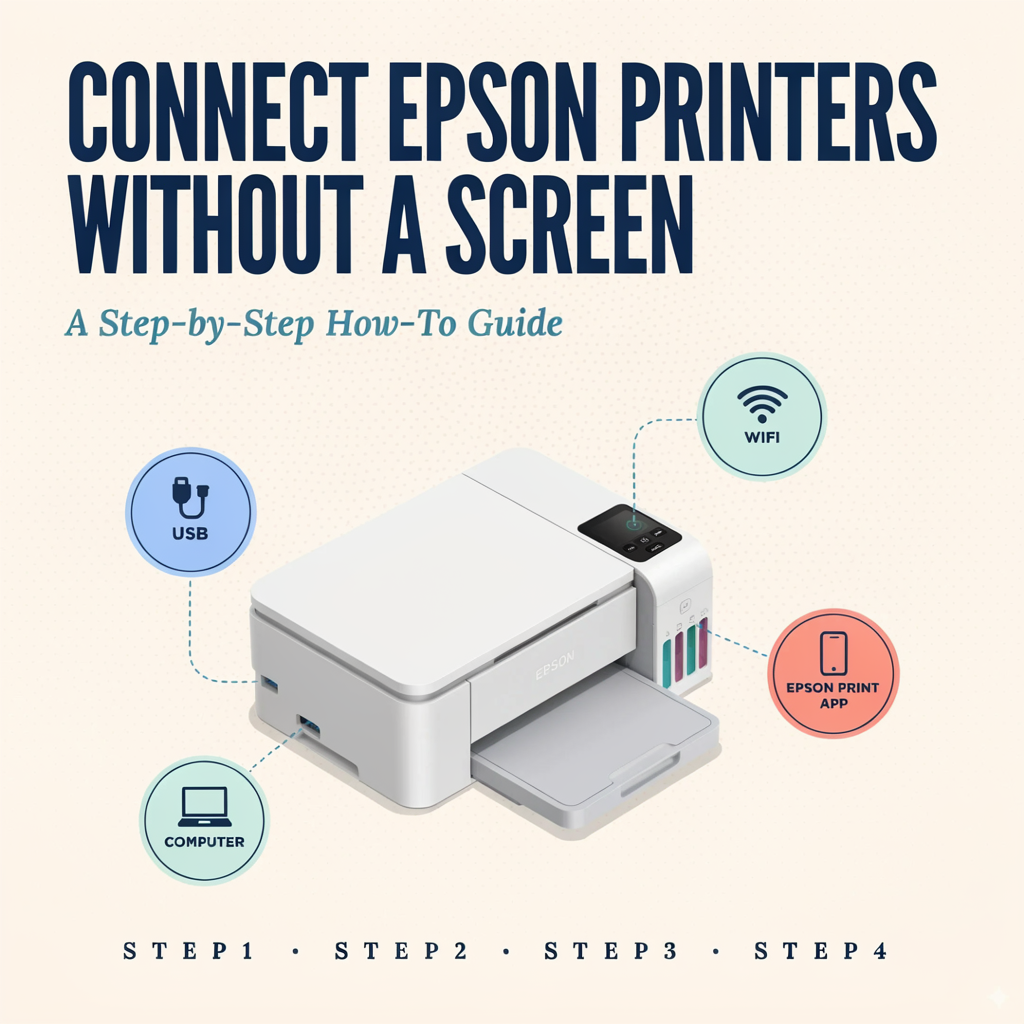
You can connect an Epson printer without a screen by using the Epson Smart Panel app, your router’s WPS button, or Epson’s setup software on a Windows PC or Mac. If you do not have access to a router, some models also support Wi-Fi Direct, which connects your phone or computer directly to the printer.
The best method depends on the exact Epson model. Button combinations, indicator lights and app support vary, so check the model number on the printer and use its official manual alongside this guide.
Screenless printers are compact and affordable, but entering a Wi-Fi password is less obvious when there is no display or keyboard. Fortunately, the printer can receive the network details from an app, a computer or a WPS-enabled router.
This UK-focused guide explains each connection method, the difference between normal Wi-Fi and Wi-Fi Direct, and what to do when an Epson printer cannot be found.
How to Connect an Epson Printer to Wi-Fi Without a Screen
Before You Start
Collect the following information before changing any settings:
- The complete Epson printer model
- Your home Wi-Fi network name, also called the SSID
- The Wi-Fi password
- A phone, tablet, Windows PC or Mac for app or software setup
- The router’s WPS button, if you plan to use WPS
- A USB printer cable if the software requests a temporary wired connection
- A few sheets of plain paper for a connection report or test page
Place the printer reasonably close to the router during setup. You can move it after confirming that the connection works.
Check the exact printer model
Epson button layouts can look similar while using different setup sequences. Find the full model number on the front or product label—for example, Epson Expression Home XP-2200 rather than simply “Epson XP.”
Enter that model on the Epson UK support page to find the correct manual, downloads and model-specific setup guidance.
Check the router’s wireless settings
Many compact Epson printers support 2.4GHz Wi-Fi, while band and security support varies by model. Do not assume that every Epson printer has the same capabilities.
If your router combines 2.4GHz and 5GHz under one network name, setup may still work normally. If an older printer cannot find the network, check its specifications and the router settings before separating bands or changing security. Avoid weakening router security merely to connect an old device; ask the router provider or Epson support if the printer does not support the current configuration.
Understand the two wireless connection types
| Connection type | How it works | Internet remains available? | Best for |
|---|---|---|---|
| Standard Wi-Fi | Printer and devices join the same router | Yes | Normal home or office printing from several devices |
| Wi-Fi Direct | Phone or computer connects directly to the printer | Not always on that device | Printing without a router or temporary troubleshooting |
For everyday use, standard router-based Wi-Fi is normally the better choice. Wi-Fi Direct is useful when there is no accessible network, but a connected phone may temporarily lose internet access or switch back to mobile data.
Compatible Epson Models Without Screens
Some Epson printers that often lack control screens include:
| Model Series | Example Models |
|---|---|
| Epson Expression Home | XP-2100, XP-2200, XP-2150 |
| Epson EcoTank | ET-2710, ET-2810, ET-2820 |
| WorkForce (Entry-Level) | WF-2830, WF-2850 |
If you own any of these models, keep reading for clear, screen less setup solutions.
Preparation Before You Begin
Before connecting your printer to Wi-Fi, ensure you have the following:
- A Wi-Fi network with a 2.4GHz frequency (Epson printers don’t support 5GHz only networks)
- The SSID (Wi-Fi network name) and Wi-Fi password
- A laptop, desktop, or mobile device
- Epson’s official printer software or the Epson Smart Panel / iPrint App
Pro Tip: Keep your printer and router in the same room during setup to avoid signal interference.
Method 1: Connect with Epson Smart Panel
For a supported newer model, Epson Smart Panel is usually the easiest option. Epson describes the app as a way to set up, monitor, print, scan and troubleshoot compatible products from a phone or tablet.
Step-by-step Smart Panel setup
- Install Epson Smart Panel from the Apple App Store or Google Play.
- Connect your phone or tablet to the home Wi-Fi network you want the printer to use.
- Enable Bluetooth temporarily if the app requests it. Bluetooth may help with discovery; printing will normally use Wi-Fi.
- Switch on the printer and wait until it finishes starting.
- Open Smart Panel and choose the option to set up or add a product.
- Allow permissions requested for local network access, Bluetooth or location when required by the operating system.
- Select your printer when it appears.
- Follow the model-specific instruction shown by the app to put the printer into setup mode.
- Select the correct Wi-Fi network and enter its password carefully.
- Wait while the settings are transferred. Do not switch off the printer, router or phone.
- When setup completes, print a test page from the app.
The exact wording in Smart Panel changes between versions and models. Follow the live prompts rather than relying on one universal button-hold time.
If Smart Panel cannot find the printer
- Confirm that the model supports Smart Panel.
- Keep the phone near the printer during discovery.
- Make sure Bluetooth and Wi-Fi are enabled if requested.
- On iPhone or iPad, allow the app to access the Local Network.
- Temporarily disable a VPN if it prevents local-device discovery.
- Check that mobile data or automatic network switching has not moved the phone away from the required network.
- Restart the app and printer, then try once more.
- Reset only the printer’s network settings using its model-specific instructions if it contains old router details.
Do not factory-reset the whole printer unless the manual or Epson support specifically requires it.
Method 2: Connect with the Router’s WPS Button
WPS can connect a compatible printer without typing the Wi-Fi password. This method can work without a phone or computer, but both the printer and router must support WPS push-button setup.
Typical WPS procedure
- Switch on the printer and place it within reliable range of the router.
- Locate the WPS button on the router. It may be labelled WPS or show a pairing symbol.
- Use the printer’s model-specific Wi-Fi/WPS button sequence to start WPS mode. A wireless light commonly begins flashing.
- Within the time stated in the manual—often around two minutes—press the router’s WPS button.
- Wait while the printer and router negotiate the connection.
- Check the printer’s Wi-Fi lights or print a network report to confirm success.
The order, buttons, light pattern and required hold time vary. Do not assume that holding the Wi-Fi button for three or five seconds is correct for every Epson printer.
When WPS is not suitable
WPS may be unavailable or disabled on:
- Some mesh Wi-Fi systems
- Routers managed through an internet provider’s app
- Business or public networks
- Networks using enterprise authentication
- Routers configured with WPS disabled for security reasons
If there is no physical or app-based WPS option, use Smart Panel or Epson’s computer setup instead.
Method 3: Use Epson Setup Software on Windows or Mac
This is a strong alternative when mobile setup fails or the printer does not support Smart Panel.
Computer setup steps
- Visit Epson UK Support.
- Search for the complete printer model.
- Select the correct operating system if it is not detected automatically.
- Download Epson’s recommended setup package, product installer or drivers for that model.
- Open the installer and choose a wireless or network connection when prompted.
- Follow the instructions to place the printer into setup mode.
- If the installer requests a temporary USB connection, connect the cable only at that stage.
- Select the home Wi-Fi network and enter the password.
- Allow the installer to transfer the settings and complete driver installation.
- Disconnect the USB cable only when the software says that it is safe.
- Print a test page from the computer.
Not every model or installer uses USB-assisted setup. Some discover the printer wirelessly or use a different setup utility. Follow the instructions for the selected model and operating system.
Avoid third-party driver sites
Download printer software from Epson’s official support page. Unofficial download sites may provide outdated, modified or unrelated software.
Method 4: Use Wi-Fi Direct Without a Router
Wi-Fi Direct creates a direct wireless link between a supported Epson printer and a phone, tablet or computer. It is not the same as joining the printer to your home router.
This method is useful when:
- There is no home Wi-Fi network
- You are travelling or working temporarily away from the router
- Router access is unavailable
- You want to test whether the printer can receive a wireless job
Typical Wi-Fi Direct process for a screenless Epson printer
- Switch on the printer.
- Enable Wi-Fi Direct using the model-specific button combination in its manual.
- Load plain paper.
- Print the advanced network or Wi-Fi status sheet using the correct information/network button for the model.
- Find the Wi-Fi Direct SSID and password on the sheet.
- Open Wi-Fi settings on the phone or computer.
- Choose the printer’s Wi-Fi Direct network name.
- Enter the printed password.
- Open Epson Smart Panel, Epson iPrint or the computer’s print settings and select the printer.
Epson’s official guidance for some screenless models uses a particular Wi-Fi and network-status button sequence, but that sequence is not universal. Confirm it in your product manual before pressing or holding buttons.
Wi-Fi Direct limitations
While connected directly to the printer, your device might not have normal internet access through Wi-Fi. It may use mobile data instead, or display a “no internet” warning. This is expected because the printer is acting as the access point.
If the printer should be available to several household devices, connect it to the main router rather than leaving it only in Wi-Fi Direct mode.
Can You Use Epson iPrint for Initial Setup?
Epson iPrint is useful for printing, scanning and selecting an Epson printer that is already accessible to the device. Depending on the model and app version, it may also provide or link to connection options.
For a completely new supported printer, Epson Smart Panel or the product’s official setup installer is generally the clearer starting point. Use iPrint when the model’s support documentation specifically directs you to it or after the printer has joined the network.
If iPrint cannot see a connected printer, confirm that the phone and printer are on the same normal Wi-Fi network. A guest network, VPN or router isolation setting can prevent local discovery.
How to Reset Network Settings Safely
You may need to clear saved network information after:
- Replacing the router
- Changing the Wi-Fi name or password
- Moving the printer to another location
- Buying a used printer with previous network details
- An incomplete setup attempt
There is no single reset sequence for all screenless Epson printers. Depending on the model, resetting network settings may involve powering on while holding an information/status button, holding a Wi-Fi-related combination, or using Epson software.
Use the Restoring Network Settings, Resetting Network Settings or similarly named section in the manual for your exact model. Reset only the network settings unless a full factory reset is genuinely required.
After a network reset, the printer forgets its saved router connection. It does not normally remove ink or change physical cartridges, but other network features will need to be configured again.
How to Print a Network Connection Report
A network connection report or status sheet can show information such as:
- Connection status
- Network name or SSID
- IP address
- Wi-Fi signal strength
- MAC address
- Wi-Fi Direct details
- Error codes or failed network checks
The correct button or combination varies. Some screenless models have a dedicated information or network-status button; others require it to be held for several seconds. Check the control-panel diagram in the official manual.
Do not publish photographs of a network sheet online. It may contain a Wi-Fi Direct password, network name, IP address or other device information.
If you need help locating the address after connection, read How to Find Your Printer’s IP Address.
Epson Printer Not Connecting to Wi-Fi: Causes and Fixes
Work through the checks in this order so that you change only one thing at a time.
| Problem | Likely cause | What to try |
| Printer does not appear in the app | Printer is not in setup mode, app lacks permission or model is unsupported | Follow the model-specific setup prompt; allow local-network/Bluetooth permissions |
| Wi-Fi password is rejected | Password entered incorrectly or wrong network selected | Re-enter it exactly; Wi-Fi passwords are case-sensitive |
| Network name is not listed | Weak signal, hidden SSID or incompatible band/security setting | Move closer to the router and check the printer’s wireless specifications |
| Printer connects but phone cannot find it | Devices are on different networks or guest isolation is enabled | Put both on the same main network and allow local-network access |
| Computer still shows printer offline | Saved printer port or driver points to an old address | Restart devices, update/reinstall Epson software and re-add the printer |
| Wi-Fi Direct works but normal Wi-Fi does not | Direct connection is active but router setup is incomplete | Run Smart Panel, WPS or computer setup for the home network |
| Connection drops frequently | Weak signal, interference or changing network address | Improve placement; consider a router DHCP reservation if the address causes repeated failures |
| Network report shows a 169.254 address | Printer did not obtain a normal address from the router | Restart and reconnect; check DHCP and Wi-Fi credentials |
1. Restart in a controlled order
Switch off the printer with its power button. Restart the router and wait until internet/Wi-Fi service is fully restored. Then switch on the printer and allow it to finish starting before testing.
2. Confirm both devices use the same network
A phone connected to guest Wi-Fi may not be allowed to communicate with a printer on the main network. Mesh systems, Wi-Fi extenders and business networks can also isolate devices even when their network names look similar.
3. Check app permissions
On iOS, Epson notes that local-network permission must be enabled for its app to find a printer. Android may request nearby-device, Bluetooth or location permission depending on the device and operating-system version.
4. Check the network name and password
The Wi-Fi password is case-sensitive. Avoid confusing uppercase I, lowercase l, the number 1, zero and the letter O. Make sure you are entering the Wi-Fi password, not the router’s administrator password.
5. Move the printer nearer to the router
Walls, floors, metal furniture and other equipment can weaken the signal. Test the printer in the same room as the router before buying an extender or changing advanced settings.
6. Review router compatibility
Check whether the printer supports the router’s frequency band, wireless mode and security type. Epson’s network reports may identify an SSID, security-key or communication-mode error.
7. Update or reinstall official software
If the printer is connected but only one computer cannot print, the network may be working correctly and the computer installation may be the issue. Remove the stale printer entry if appropriate, download the current Epson package for the model and add it again.
8. Stabilise a changing IP address correctly
Most home users should leave automatic DHCP enabled. If the printer repeatedly receives a new address and a computer continues trying the old one, create a DHCP reservation in the router. This is generally safer than manually assigning an arbitrary static address that could conflict with another device.
How to Confirm That the Printer Is Connected
A steady Wi-Fi indicator can be helpful, but its meaning differs by model. Use one or more of these checks:
- Print a network connection report and confirm the correct SSID and a normal local IP address.
- Open Smart Panel or Epson iPrint and check whether the printer appears as ready.
- Print a test page from a device connected to the same network.
- Check the router’s connected-device list.
- Enter the printer’s current IP address into a browser if the model provides an embedded web configuration page.
Test from at least one device before moving the printer away from the router.
How to Connect After Changing Router or Wi-Fi Password
The printer cannot automatically know a new network name or password. Treat it as a fresh connection:
- Confirm that the new router is fully working.
- Reset the printer’s network settings using its model-specific manual.
- Connect the phone or computer to the new Wi-Fi.
- Run Smart Panel, WPS or Epson computer setup again.
- Re-add the printer on devices that retain the old network entry.
- Print a new network report and test page.
If the new router uses the same SSID and password as the previous one, the printer may reconnect automatically, but this is not guaranteed when security or wireless settings have changed.
FAQs
How do I connect my Epson printer to Wi-Fi without a screen?
Use Epson Smart Panel on a supported phone or tablet, WPS on a compatible router, or Epson’s setup software on Windows or Mac. The exact printer-button instructions depend on the model.
Can I connect an Epson printer without a computer?
Yes. A supported printer can be set up with Epson Smart Panel on a phone or, in some cases, by using WPS on the router. You do not always need a computer.
Can I connect it without a phone or computer?
Possibly. If the printer and router both support WPS push-button setup, WPS can create the connection without entering the password on another device.
Why is my Epson printer not showing in Smart Panel?
It may not be in setup mode, the model may not support Smart Panel, or the app may lack local-network, Bluetooth or location permission. Keep the phone close, check permissions and follow the official setup steps for the model.
Does an Epson printer require 2.4GHz Wi-Fi?
Many compact and older models use 2.4GHz, but capabilities vary. Check the technical specifications for your exact model rather than applying one rule to all Epson printers.
What is the difference between Wi-Fi and Wi-Fi Direct?
Normal Wi-Fi connects the printer to a router so several devices on the network can use it. Wi-Fi Direct connects a device straight to the printer without a router and may interrupt that device’s normal Wi-Fi internet connection.
Where can I find the Epson Wi-Fi Direct password?
On many screenless models, it appears on an advanced network status sheet. Use the model’s manual to identify the correct button sequence for printing that sheet.
Why is the Wi-Fi light flashing?
It can indicate setup, connection activity or an error depending on the model and flash pattern. Check the control-panel lights section of the model’s manual.
Will a network reset remove my ink settings or documents?
A network-settings reset normally removes saved connection information rather than installed ink. Its exact effect varies, so use the model-specific network reset rather than a full factory reset.
Why does Wi-Fi Direct say there is no internet?
The device is connected to the printer rather than the router. This is expected. Switch back to the home Wi-Fi after printing, or connect the printer to the router for normal network use.
Can I connect an Epson printer to a guest Wi-Fi network?
It may join the network, but guest networks commonly prevent devices from communicating with each other. Use the trusted main network unless the network administrator confirms local-device access is allowed.
Why does the printer keep going offline?
Possible causes include weak signal, router isolation, a stale driver or printer port, sleep behaviour, or a changing IP address. Improve placement, reinstall the official software if necessary and consider a DHCP reservation when address changes are the confirmed cause.
Final Thoughts
The absence of a screen does not prevent an Epson printer from joining Wi-Fi. For a supported newer model, begin with Epson Smart Panel. Use WPS when both the printer and router support it, or use Epson’s Windows or Mac setup software when mobile discovery fails. Choose Wi-Fi Direct only when you need a router-free connection or a temporary alternative.
The essential rule is to follow instructions for the exact printer model. Wi-Fi buttons, reset sequences, indicator lights and report-printing commands are not universal across Epson’s range.
Once connected, print a network report and a test page. If the printer remains offline, confirm that every device is on the same normal network before changing advanced router settings.
Looking for replacement ink? Browse compatible Epson ink cartridges by cartridge family, and always check both the cartridge code and printer model before ordering.
Stay connected, print smarter.