
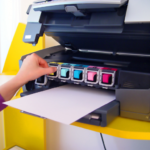
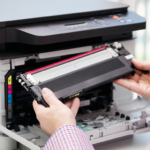

An Epson 18XL cartridge not recognised error usually means the printer cannot communicate correctly with one of the installed cartridges. The cartridge may be the wrong number, not fully seated, still covered by protective material, empty, or affected by a dirty or damaged electronic chip.
In many cases, the problem can be fixed safely by identifying the affected colour, removing and checking that cartridge, and reinstalling it correctly. This guide takes you through the causes in a sensible order so you do not waste ink, damage the printer or replace a complete set unnecessarily.
Epson 18XL Cartridge Not Recognised
The Epson 18 and 18XL range is commonly known as Daisy ink. It is used by selected Epson Expression Home printers, including the XP-102, XP-202, XP-205, XP-212, XP-215, XP-225, XP-30, XP-302, XP-305, XP-312, XP-315, XP-322, XP-325, XP-402, XP-405, XP-405WH, XP-412, XP-415, XP-422 and XP-425.
Quick answer: how do I fix an Epson 18XL cartridge not recognised error?
First, confirm that the cartridge number and printer model are compatible. Keep the printer switched on and use its cartridge-replacement function to move the holder into position. Remove only the cartridge named in the error, check that all required protective tape has been removed, inspect the chip for dirt or damage, then reinstall the cartridge firmly until it clicks.
Close the printer and allow ink charging to finish. If the error remains, turn the printer off using its power button, wait until all lights are off, disconnect the power briefly, reconnect it and restart. If the same cartridge is still rejected after being checked and reseated, request a replacement from the retailer.
What does “ink cartridge not recognised” mean?
Epson 18XL cartridges contain an electronic chip. The printer uses this chip to identify the cartridge, confirm its colour and monitor information such as its ink status.
A recognition error means the printer cannot validate the information it expects from the cartridge. It does not automatically mean that the printer itself is faulty. The cause is often limited to one cartridge or one installation step.
Common messages include:
- Ink cartridge not recognised
- Ink cartridges cannot be recognised
- Replace cartridge
- Cartridge not installed correctly
- Incompatible ink cartridge
- Ink cartridge error
On an Epson model without a display, the ink light may remain on after the cartridge has been installed. Epson Status Monitor on a connected computer can help identify which colour is causing the error.
Before you start troubleshooting
Work through the following checks one at a time. Repeatedly removing every cartridge makes it harder to identify the faulty item and can consume additional ink when the printer recharges the system.
Before touching the cartridges:
- Cancel any active print job.
- Keep the printer switched on while moving the holder to the replacement position.
- Use the printer’s button or maintenance menu; never drag the holder by hand.
- Do not touch the white ribbon cable inside the printer.
- Protect the work surface in case there is ink around a used cartridge.
- Do not switch off the printer while its power light is flashing during ink charging.
1. Check for an incorrect cartridge number
The most important first check is the cartridge number. A cartridge can look almost identical to another Epson range and still use a different chip or physical keying.
Printers designed for the Daisy range use:
| Colour | Epson 18XL reference |
|---|---|
| Black | T1811 |
| Cyan | T1812 |
| Magenta | T1813 |
| Yellow | T1814 |
| Four-colour multipack | T1816 |
The “XL” label describes higher ink capacity; it does not make the cartridge universal. Epson 18XL will not work in a printer that requires 29XL, 33XL, 603XL, 604XL or another cartridge family.
Check the exact model number printed on the front or rear label of your printer. Then compare it with the compatibility list on the cartridge product page. Do not rely only on the cartridge’s shape, colour or flower image.
You can view the complete Epson 18 and 18XL Daisy cartridge range before ordering. If you use an Epson Expression Home XP-102, the dedicated Epson XP-102 ink-cartridge page brings together the compatible options for that model.
Also check the cartridge colour
Make sure each cartridge is installed in the matching slot:
- BK: black
- C: cyan
- M: magenta
- Y: yellow
A cartridge placed in the wrong colour position will not be accepted. Remove it through the correct replacement procedure and install it in its labelled slot.
2. Make sure the cartridge is fully seated
A cartridge can appear to be installed while sitting slightly above the electrical contacts. If it is not fully seated, the chip and printer cannot communicate.
To reseat the cartridge safely:
- Switch the printer on.
- Use the ink button or Maintenance > Ink Cartridge Replacement, depending on the model.
- Wait until the holder stops in the replacement position.
- Press the cartridge’s release tab and lift it out carefully.
- Check that its side hooks and plastic body are not cracked.
- Return it to the correct colour slot.
- Press down firmly and evenly until it clicks.
- Check that it sits level with the neighbouring cartridges.
- Close the cover or scanner unit and follow the printer’s prompts.
Do not use excessive force. If the cartridge will not fit naturally, stop and recheck its number and orientation.
If you recently fitted a complete Cynopack compatible Epson 18XL T1816 multipack, identify the colour named by the printer rather than immediately removing the entire set.
3. Check whether a protective strip is still attached
New cartridges normally have protective packaging or sealing material that must be removed before installation. A remaining strip can prevent correct seating, block an air vent or interfere with normal ink delivery.
Remove the cartridge and compare it with the installation instructions supplied in the packaging. Check for:
- A yellow pull tape that should have been removed
- Clear transport film around the cartridge body
- Packaging covering the chip or preventing the cartridge from sitting flat
- A pull tab that has torn and left part of the seal behind
Remove only the material identified by the cartridge instructions. Do not peel off the main product label, puncture the cartridge or remove the transparent seal over the ink outlet unless the supplied instructions specifically tell you to do so. Epson warns that removing the wrong seal or label can make a cartridge unusable or cause leakage.
After removing the correct protective strip, reinstall the cartridge and press it down until it clicks.
4. Inspect and clean the cartridge chip
The small electronic chip on the cartridge allows it to communicate with the printer. Fingerprints, dust, dried ink, adhesive residue, corrosion or scratches can interrupt that contact.
Remove the affected cartridge and inspect the chip in good light. Look for:
- Ink or dust on the contact area
- Fingerprints or grease
- Adhesive left by packaging
- Deep scratches
- A loose, cracked or missing chip
- Bent or visibly damaged contact points
If the chip is merely dirty, wipe it gently with a clean, dry, lint-free cloth. Use light strokes and avoid touching it with your fingers afterwards. Do not scrape it with a sharp object or saturate it with cleaning liquid.
Also inspect the cartridge slot for obvious dust or packaging fragments, but do not insert tools, spray cleaner into the printer or touch the printer’s electrical contacts. If the internal contacts appear bent or damaged, stop and seek technical support.
Reinstall the cartridge firmly and allow the printer to check it again.
5. Check whether the cartridge is empty or previously recorded as empty
An Epson printer may report a cartridge as unrecognised when the cartridge’s chip indicates that its usable ink has been exhausted. A cartridge can still contain a small amount of visible ink because inkjet systems retain a safety reserve to help protect the print head.
Do not assume that visible ink means the cartridge can continue printing. The printer relies on the chip’s recorded status rather than a visual inspection.
A cartridge may also be rejected after it has been removed and reinserted when it was already extremely low. Epson notes that low-status cartridges may not be usable after reinsertion.
If the cartridge was previously used, displayed a low-ink warning or came from another printer, replace it with a new cartridge. Compatible cartridges are not intended to be manually reset, opened or refilled unless they are specifically designed and sold as refillable products.
6. Consider a firmware or compatibility issue
Firmware is the software built into the printer. It controls hardware functions and communication with installed cartridges.
A recognition error that starts immediately after a firmware update may indicate a compatibility issue between the printer’s current firmware and the cartridge chip. However, firmware should not be blamed before checking the simpler causes: wrong cartridge number, protective material, poor seating, a dirty chip or an empty cartridge.
If the error began after an update:
- Record the printer model and the exact error message.
- Check whether an original cartridge or another known-compatible cartridge is recognised.
- Confirm when and where the affected cartridge was purchased.
- Contact the cartridge retailer and provide the printer model, cartridge colour and order details.
- Check the printer manufacturer’s support page for model-specific notices.
Avoid downloading unofficial firmware files, forcing a firmware downgrade or disconnecting power during an update. An interrupted or incorrect firmware installation can leave the printer unusable and may create a more serious problem than the cartridge error.
For compatible ink, the sensible remedy is normally to obtain a current replacement cartridge confirmed for your printer and firmware—not to modify the printer.
7. Follow this safe restart procedure
A controlled restart can clear a temporary communication fault after the cartridge has been checked and reseated.
Safe power-cycle steps
- Close the cartridge cover or scanner unit completely.
- If the printer is charging ink and the power light is flashing, wait for it to finish.
- Cancel any remaining print jobs on the computer.
- Turn the printer off using its own power button.
- Wait until the display and all operating lights are fully off.
- Disconnect the power cable from the printer or wall socket.
- Leave it disconnected for approximately 60 seconds.
- Reconnect the power directly and switch the printer on.
- Wait for startup to finish before sending a test page.
Always use the power button before unplugging the printer. Do not cut the power while the power light is flashing, the print head is moving or ink charging is taking place.
If the same cartridge is still rejected after one controlled restart, repeatedly switching the printer on and off is unlikely to solve it. Continue to the isolation test below.
How to identify which cartridge is causing the problem
When several cartridges were installed together, isolate the affected colour methodically:
- Read the error message or Epson Status Monitor to identify the named colour.
- Reseat only that cartridge.
- If the printer identifies a different cartridge next, repeat the check for that colour.
- Note each cartridge code and batch or production code printed on it.
- If available, test with a new, known-compatible cartridge of the affected colour.
Do not swap different colours between slots. Do not repeatedly remove recognised cartridges without a reason.
If the printer rejects every cartridge simultaneously, first check that the cartridge family matches the printer. If the cartridges are correct, inspect whether the holder is in the proper replacement position and whether any packaging is preventing the cartridges from seating fully.
When should you request a replacement?
Request a replacement when:
- The cartridge number is correct for your printer.
- The protective material has been removed as instructed.
- The cartridge is fully clicked into the correct colour slot.
- The chip has been checked and gently cleaned.
- The printer has completed one safe restart.
- Other cartridges are recognised but the same new cartridge is consistently rejected.
- The chip, plastic hooks or cartridge body appear damaged.
- The cartridge arrived leaking or with damaged packaging.
- The error appeared immediately on first installation.
Do not continue forcing, opening or modifying a cartridge you intend to return. That may create leakage and make the original fault harder to assess.
Information to send the retailer
To speed up support, provide:
- Your order number
- Printer make and exact model
- Cartridge number and colour
- The error message shown
- Whether the problem occurred on first installation
- The production or batch code printed on the cartridge
- A clear photograph of the cartridge and its chip
- A screenshot or photograph of the printer error, if possible
- The troubleshooting steps already completed
If you purchased from Cynopack, this information will help the support team confirm compatibility and determine whether a replacement cartridge is required.
When the cartridge may not be the problem
If several new, correct cartridges fail in the same slot, the cartridge holder’s internal contact may be dirty, bent or damaged. The issue may also relate to the printer’s electronics rather than the cartridges.
Signs that the printer may require service include:
- Every cartridge fitted in one particular colour slot is rejected.
- The holder or contact pins appear physically damaged.
- The printer reports unrelated service or ink-pad errors.
- Recognition changes when the printer or holder is moved.
- The error continues with a new original cartridge confirmed for the model.
Do not attempt to bend internal contacts or dismantle the cartridge holder. Contact Epson support or a qualified printer technician.
What not to do
Avoid common online “fixes” that may damage the cartridge or printer:
- Do not move the print head by hand.
- Do not cover, cut or modify the cartridge chip.
- Do not scrape the chip with a knife or abrasive material.
- Do not spray contact cleaner or water inside the holder.
- Do not switch off the power during ink charging or a firmware update.
- Do not install a cartridge from a similar but incompatible Epson range.
- Do not repeatedly run print-head cleaning for a recognition error.
- Do not assume a recognition error is caused by blocked nozzles.
Print-head cleaning addresses missing lines and poor print quality; it does not repair communication between the cartridge chip and printer.
Epson 18XL recognition troubleshooting checklist
| Check | What to confirm | Next action |
| Cartridge number | T1811, T1812, T1813, T1814 or T1816 for a compatible model | Replace an incorrect cartridge |
| Colour position | BK, C, M or Y matches its slot | Move it using the proper replacement procedure |
| Installation | Cartridge sits level and clicks into place | Remove and reseat it |
| Protective material | Required yellow strip and transport film removed | Remove only as instructed |
| Chip condition | Clean, dry and undamaged | Gently wipe with a dry lint-free cloth |
| Ink status | Cartridge is new and not previously recorded empty | Fit a new replacement if exhausted |
| Power state | Printer restarted through its power button | Complete one controlled power cycle |
| Firmware timing | Error began immediately after an update | Record details and contact the retailer |
| Repeated failure | Same new cartridge fails after all checks | Request a replacement |
Frequently asked questions
Why is my Epson 18XL cartridge not recognised after installation?
The most common causes are an incorrectly seated cartridge, remaining protective material, the wrong cartridge number or a chip that cannot make clean contact with the printer. Remove and check only the affected colour, then reinstall it firmly in the correct slot.
Can I mix Epson 18 and 18XL cartridges?
Yes, standard Epson 18 and high-capacity Epson 18XL cartridges can normally be used together in printers designed for the Daisy range. Each installed cartridge must still be the correct colour and compatible reference for that printer.
Why does the printer recognise three cartridges but not the fourth?
This usually points to a problem limited to the fourth cartridge or its slot. Check its number, protective strip, seating and chip. If another new cartridge also fails only in that slot, the printer’s internal contact may need professional inspection.
Can a firmware update stop a compatible Epson cartridge working?
Firmware can affect how a printer communicates with cartridge chips, so timing may be relevant if the error began immediately after an update. First exclude physical installation and compatibility problems. Contact the cartridge supplier for a current replacement rather than attempting an unofficial downgrade.
Should I clean the cartridge chip with alcohol?
A clean, dry, lint-free cloth is the safer first choice. Avoid soaking the chip or spraying liquid into the printer. If the chip is scratched, loose or physically damaged, cleaning will not repair it and the cartridge should be replaced.
Will restarting the printer reset an empty Epson 18XL cartridge?
No. A restart may clear a temporary communication fault, but it will not restore the chip status of a genuinely exhausted cartridge. If the printer has recorded the cartridge as empty, fit a new replacement.
Why is there ink left when the printer says the cartridge is empty?
Inkjet cartridges may retain a small safety reserve when replacement is requested. This helps protect the print head and maintain print quality. The presence of a little visible ink does not mean the cartridge can safely continue printing.
Do I need to replace the whole T1816 multipack if one cartridge fails?
Usually not. Epson 18XL cartridges are individual units. Identify the colour causing the error and troubleshoot or replace that cartridge. Leave the recognised cartridges installed unless the printer specifically identifies them as faulty.
When should I contact Cynopack for a replacement?
Contact Cynopack when a new, correctly matched cartridge remains unrecognised after you remove the required packaging, reseat it, inspect the chip and perform one safe restart. Send the order number, printer model, cartridge colour, production code and photographs where possible.
Final advice
When an Epson 18XL cartridge is not recognised, start with the cartridge number and installation rather than changing printer settings. Confirm that the cartridge belongs to the Daisy range, remove only the required protective strip, check the chip and press the cartridge down until it clicks.
If one controlled restart does not clear the error and the same new cartridge continues to fail while the others work, the most practical next step is to request a replacement. If multiple known-good cartridges fail in the same slot, seek printer support rather than modifying the cartridge holder yourself.